Upgrading a Raspberry Pi CM4
Published:
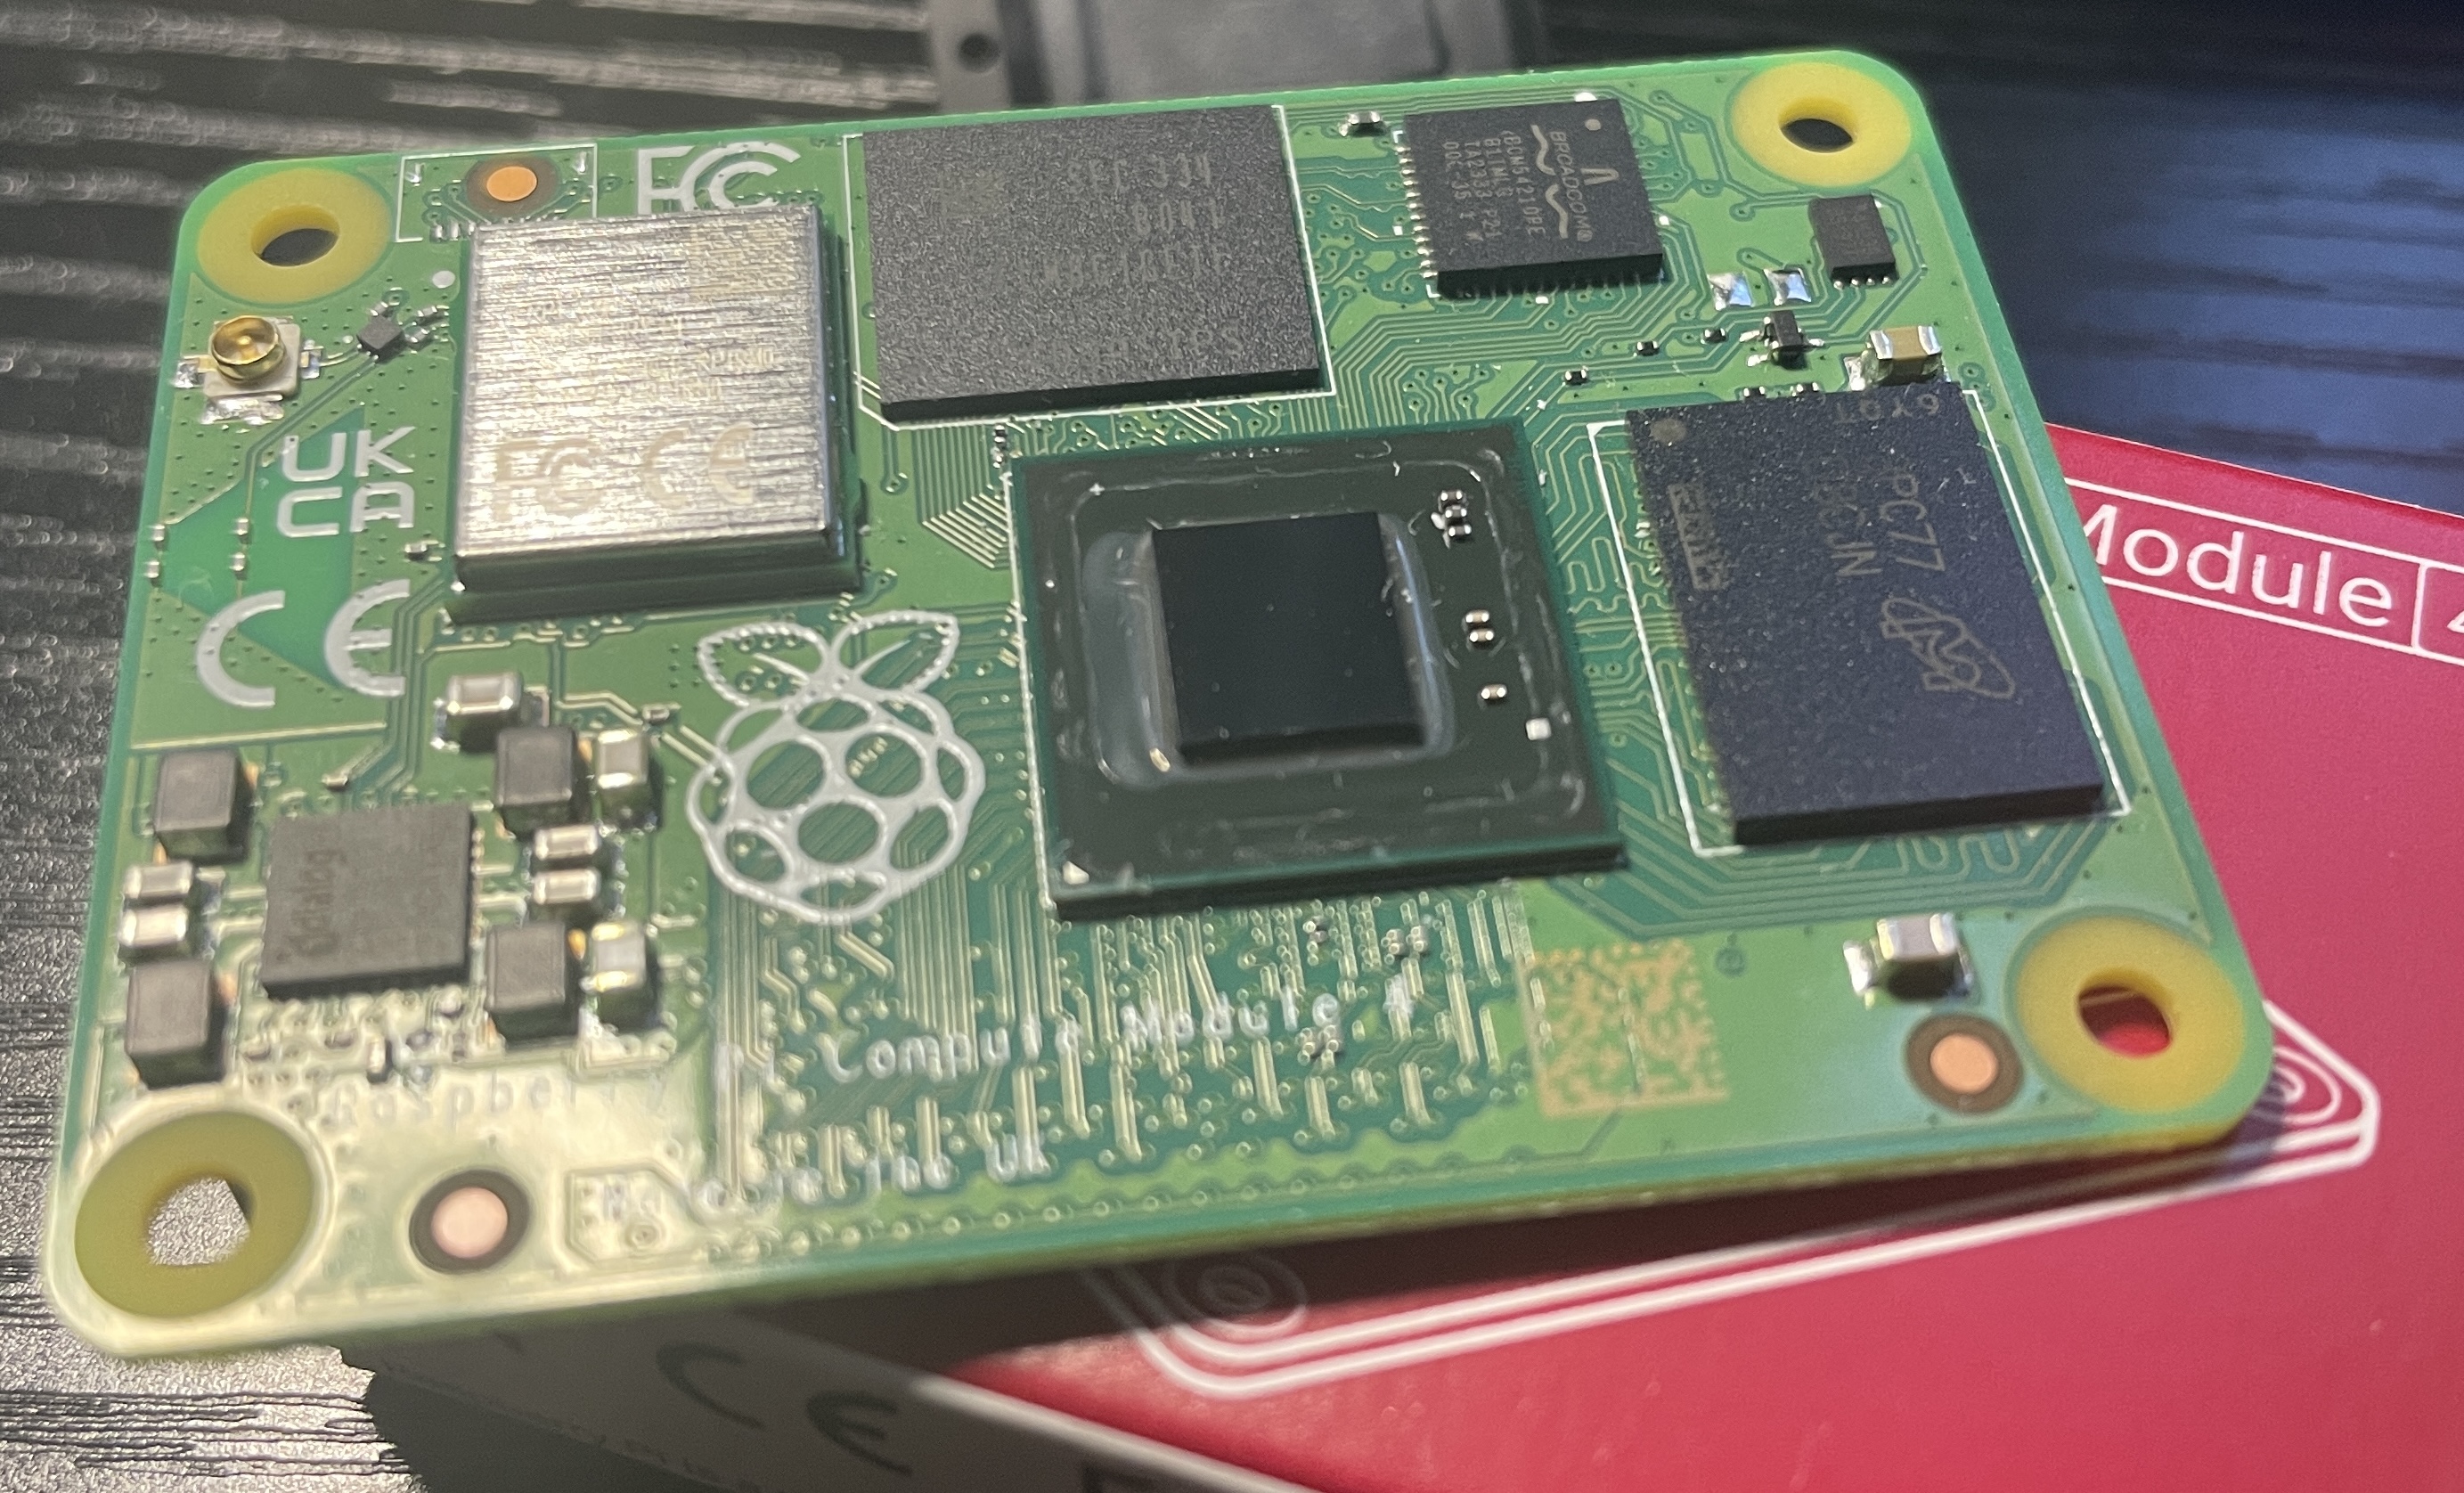
I had couple of Raspberry Pi CM4 boards with the lowest specs, each with 1GB of memory and 8GB of eMMC. Both of these specs are not great when you want to do some resource intensive computations with these single board computing devices. This became a limiting factor especially when trying to run heavier workloads, containerized applications, or even basic development environments.
Background
With a little bit of research related to RAM upgrade and eMMC upgrade, I found that there are some existing work on this front and I am bit late to the party. However, I still wanted to attempt both memory and eMMC upgrades myself, mainly to see how far the CM4 hardware could be pushed and to get some hands-on experience with BGA rework.
Components Used
In this case I found the following part numbers that should do the trick:
- eMMC Part number: THGBMHT0C8LBAIG eMMC 128GB
- LPDDR4 8GB RAM Part number: D9ZCL MT53E2G32D4NQ-046 WT:A 4266Mbps
These components are commonly used in similar upgrade attempts and are electrically compatible with the CM4, although not officially supported by Raspberry Pi. Luckyly, I was able to source both of them under $40 total.
Tools & Preparation
I also found the correct stencil that contains the proper footprints for BGA200 for the RAM and BGA153 for the eMMC. Along with that, I used:
- Hot air rework station
- High quality flux
- Fine solder wire
- Microscope for alignment and inspection
However, the solder balls technique did not work well with me. It was difficult to get consistent results and proper alignment using preformed balls.
Later, I decided to go with lot of flux and manually reballing with a very high quality solder wire. This method gave me more control, although it required a lot more patience and precision. Alignment of the chips and maintaining uniform solder distribution was quite challenging.  Thermal control was another tricky part, since overheating could easily damage the board or nearby components. Multiple attempts were needed before getting a reliable process.
Success!
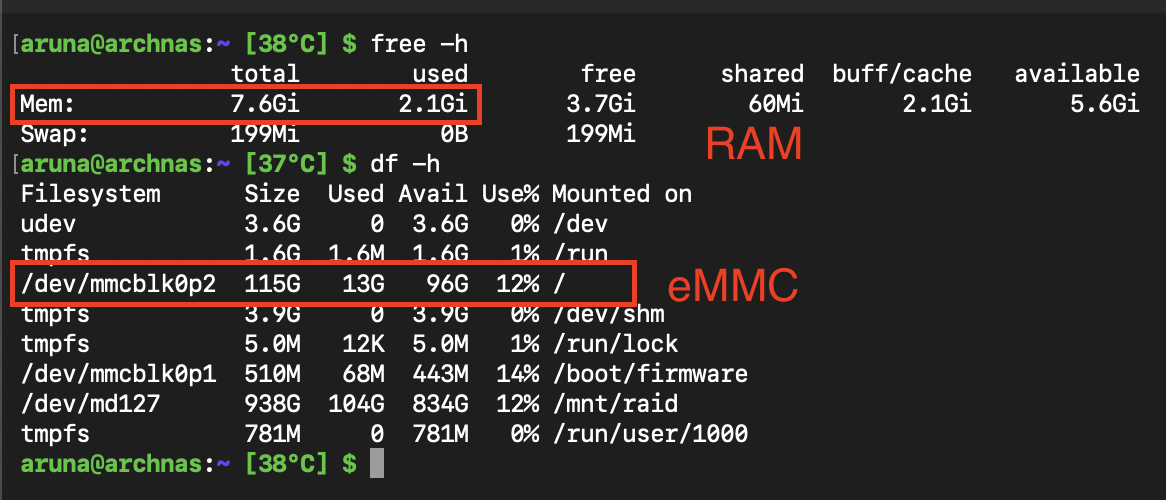 After lot of flux and time, I got both the RAM and the eMMC working fine. The board was able to boot successfully, recognize the upgraded storage, and operate with the increased memory capacity.